


Interactive maps have become an essential component of modern web applications. They not only provide users with visual representations of data but also allow for engaging and dynamic user experiences. Mapbox GL JS is a powerful JavaScript library that enables developers to create interactive, customizable, and performant maps. In this Article, we will explore how to integrate Mapbox GL JS into a React + Vite application and build an interactive map.
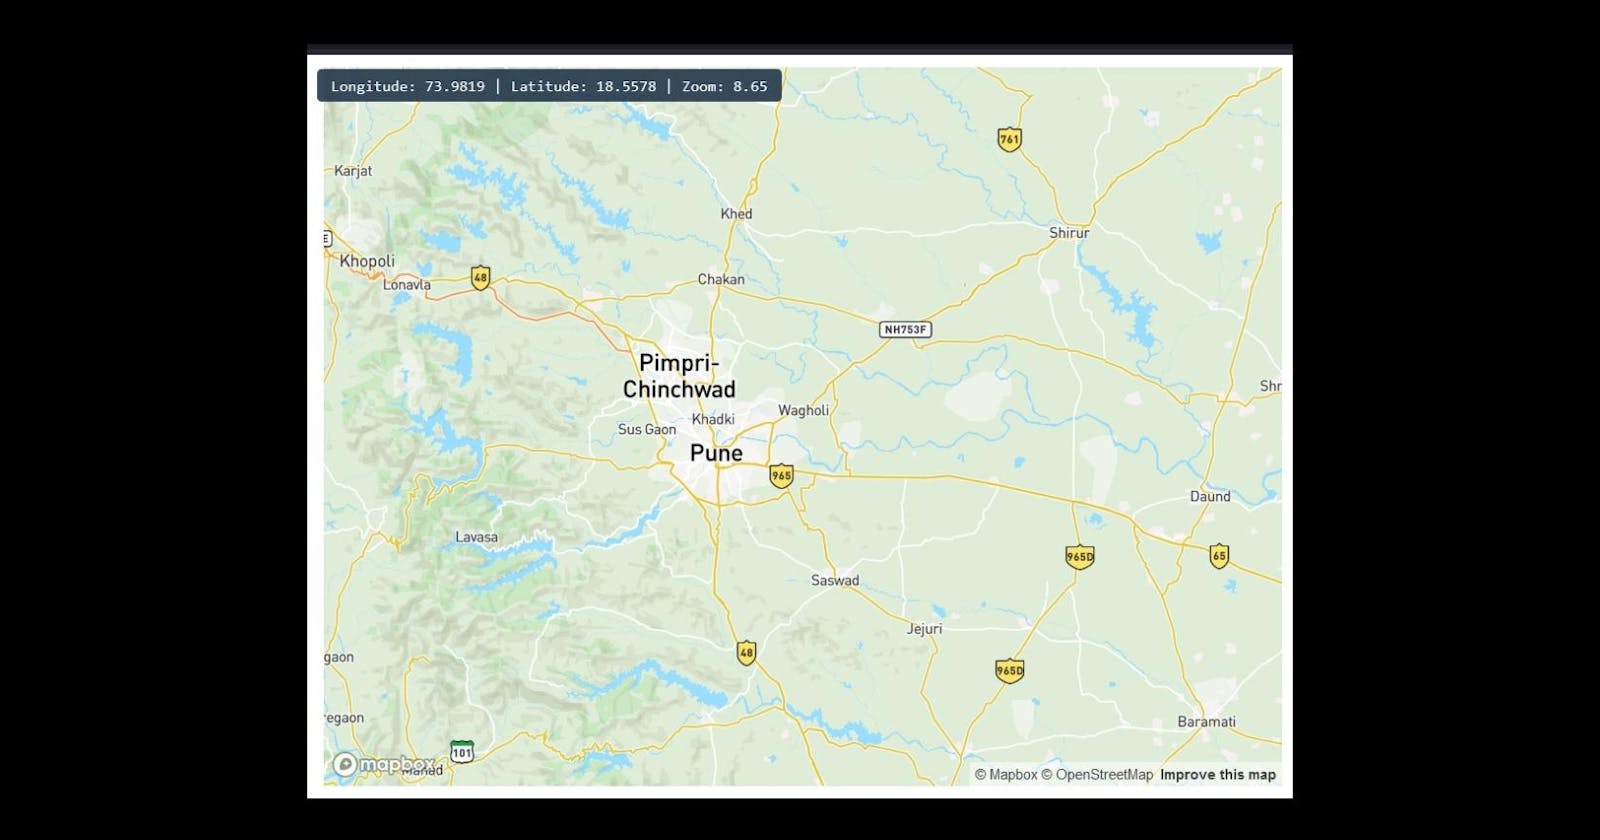
Final Output

final output
Prerequisites
Before we begin, make sure you have the following prerequisites installed on your system:
https://nodejs.org - Node.js
https://yarnpkg.com - Yarn or npm (Node Package Manager)
I will be using npm in this article.
Setting Up the Project
Let's start by creating a new React + Vite project and installing the necessary dependencies.
Step 1: Create a new project using Vite.
npm create vite@latest

New react project using vite

Vite Project Structure
Step 2: Install React and other required dependencies.
npm install react-router-dom mapbox-glStep 3: Install Mapbox GL JS and its React wrapper.

installing dependencies
Start the server with : npm run dev

vite server
Step 3 : Create your mapbox access token by creating a free Account <a href="https://account.mapbox.com/">Mapbox</a>

accessing mapbox token
Building Interactive Maps in React + Vite App
1. Create public/index.html file
HTML
<!doctype html>
<html lang="en">

<head>
  <meta charset="UTF-8" />
  <link rel="icon" type="image/svg+xml" href="/vite.svg" />
  <meta name="viewport" content="width=device-width, initial-scale=1.0" />
  <title>MapBox GL</title>
</head>

<body>
  <div id="root"></div>

  <script type="module" src="/src/main.jsx"></script>
</body>

</html>
output :

This code creates the basic structure of the HTML page your users will see. There is a <div> element with the ID "root" in the <body> of the page. This <div> is the container in which the Bite+react app will be rendered on the page.
2. Import mapbox styles in main.jsx
src/main.jsx

main.jsx
3. Add Mapbox GL JS in App.jsx
4. Set up App's initlal states
src/App.jsx

5. Use "UseEffect()" to initialize Map

useEffect to initialize map
1. The style option defines the style that the map will use (mapbox://styles/mapbox/streets-v12)
2. The center and zoom options set the center coordinates and zoom level of the map using the values of lng, lat, and zoom that are stored in state.
3. If you are using hooks, you also created a map useRef to store the initialize the map. The ref will prevent the map from reloading when the user interacts with the map.
6. Render the Map
src/App.jsx

render map
7. Style the map-container
.map-container {
height: 600px;
width: 800px;
margin: 0 auto;
}
Save the changes.
Result :

Result
Displaying the coordinates
1. Store the Co-ordinates
src/App.jsx

Store co-ordinates
getCenter() - this is Mapbox GL JS methodd to get the lattitude and longitude of the center point of page
toFixed() - this is JS method that truncates resukting floating number to certain number of digits
getZoom() - this is Method which is used to get the zoom level of map
save the changes
2. Display the co-ordinates
src/App.jsx : (returen paratmeters along with map)
return (
<div>
<div className="sidebar">
Longitude: {lng} | Latitude: {lat} | Zoom: {zoom}
</div>
<div ref={mapContainer} className="map-container" />
</div>
);
src/App.css : Include (slidebar styles)
.sidebar {
background-color: rgba(35, 55, 75, 0.9);
color: #fff;
padding: 6px 12px;
font-family: monospace;
z-index: 1;
position: absolute;
top: 0;
left: 350px;
margin: 12px;
border-radius: 4px;
}
Save changes.
Final Product

Mapbox: https://www.mapbox.com/
Learn React.js: https://react.dev/learn
I hope this blog helped you !! Stay tuned for more interesting tutorials like this :
Connect with me: https://linktr.ee/Devgrammer